From Rust to Radiant: A Guide to Re-Seasoning Your Cast Iron
Share


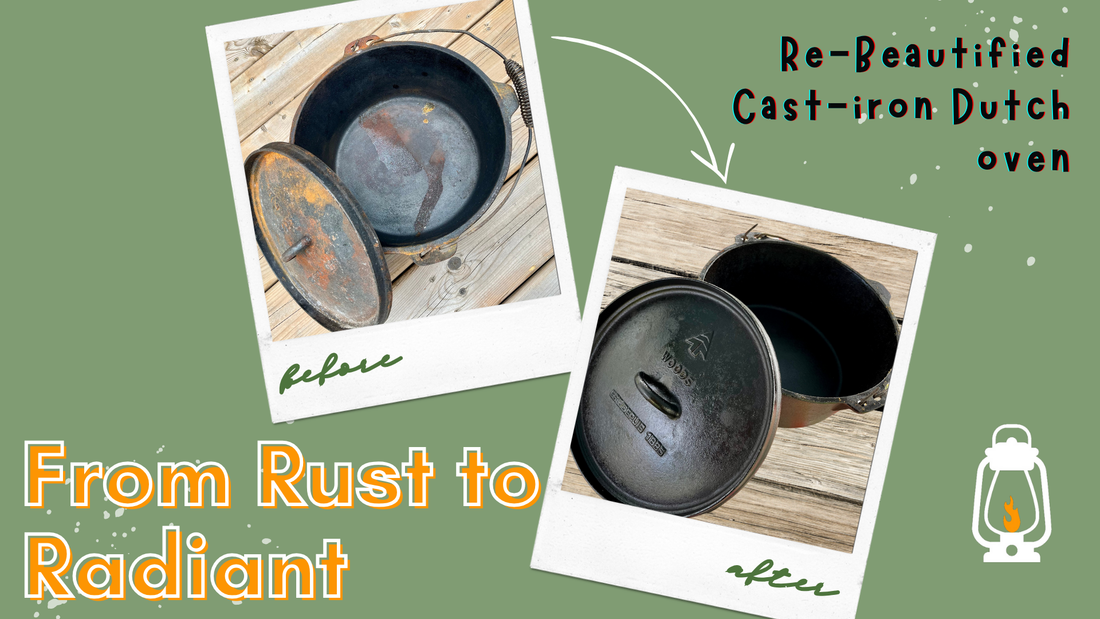
Time to get started, here I have one dutch-oven in need of series pre-season TLC! Let's call this the "before" picture. Here's what I did to move from rust to radiant:
💫 Clean it up! I scrubbed off the rust and residue from the dutch oven. You could use a stiff brush, steel wool, or even a ball of aluminum foil will take off the rust. I made a stop to pick up the “Assorted Sizes” of steel wool (Canadian-made from a Canadian retailer of course), took my dutchie outside, donned my glampiest garden gloves (highly recommend some kind of glove if your cast-iron is as rusty as mine ) and scrubbed away! I probably scrubbed for 30 minutes, inside, outside, upside down! Oh, and the lid too! Then I washed it with warm, soapy water to remove any remaining debris. But no soap with lye (it can damage the seasoning)!

💨 Dry thoroughly! After washing, I needed to make sure the dutch oven was completely dry. I towelled it dry first, and then let it air dry for a while to ensure there was no moisture left.
🔥 Pre the kitchen oven! While it was air drying, I preheated the oven to around 350-400°F (175-200°C). This time I remembered to check that my oven racks were positioned to accommodate the Dutch oven - not my usual oven rack set-up - before the oven got hot! If it's a nice day, I might use my BBQ instead of the kitchen oven. The temperature is harder to control, but it keeps the house cooler!

🌟 Apply the oil! Once the Dutch oven was dry, I applied a thin layer of oil to the entire surface, including the inside, outside, handles, and lid. You can use vegetable oil, flaxseed oil, or any other oil with a high smoke point... NOT olive oil, the smoke point is too low! Make sure to coat the entire surface evenly, but don't apply too much oil, or it might become sticky!

♨️ Bake! I put the Dutch oven upside down on the middle rack of my preheated oven or BBQ. I like to place the lid upside down on the little "feet" of the dutch oven, that way it all fits in. Sometimes I even remember to put a sheet of aluminum foil or a baking pan on the bottom rack to catch any drips, but usually I forget - this time I remembered! I left the dutch oven to "bake" for about an hour.
❄️ Cool down! After an hour, I turned off the oven and let the dutch oven cool down INSIDE the oven. By leaving it inside, I'll keep myself from getting burnt!
🕒 Repeat! Depending on the how it turns out, I somestimes repeat the seasoning process a few times to re-build up a good layer of seasoning. Each time you repeat the process, the seasoning will become more durable and clearly I didn't do it enough before heading out last season.

☝️Lastly! This year I vow to store it properly. Best to keep it in a dry place to prevent rust from forming again, I might even place a paper towel or cloth inside to absorb any moisture.
Have you touched up any of your cast iron classics? I'd love to see your 'before' and 'afters', and hear any tips or tricks you might have! Share them over at the Facebook group: Glamping Essentials Campfire Collective
Glamping Essentials, where even the cast-iron is fancy!
~ Anja
